3D printing makes the actuators possible – the bearings, and motor all need to be at certain positions and held solidly in alignment. Without 3D printing this would likely mean CNC machined aluminium blocks.
It isn’t as daunting as you think, and isn’t as expensive as you’d think. Once you get past the initial setup it’s usually only a couple of minutes setup work and your print is underway. The SFX-100 actuators require around 200 hours of printing with 20 individual parts that need printing.
The process to print is
- Buy, build and calibrate your printer
- Download .stl files you want to print
- Run them through a “Slicing” program, this (a) turns the solid 3D model into a structure of layers and ‘infill’, then (b) outputs the “GCode” this is commands that tell the printer what to do, layer by layer,
- Put the resulting .gcode files on an SD card, and into your printer
- Load up PLA (type of plastic filament)
- Print !
- Rinse and repeat
Please note there is a dedicated thread on the German VirtualRacing.org forum for 3D Printing parts, and a lot of help in the RaceDepartment thread

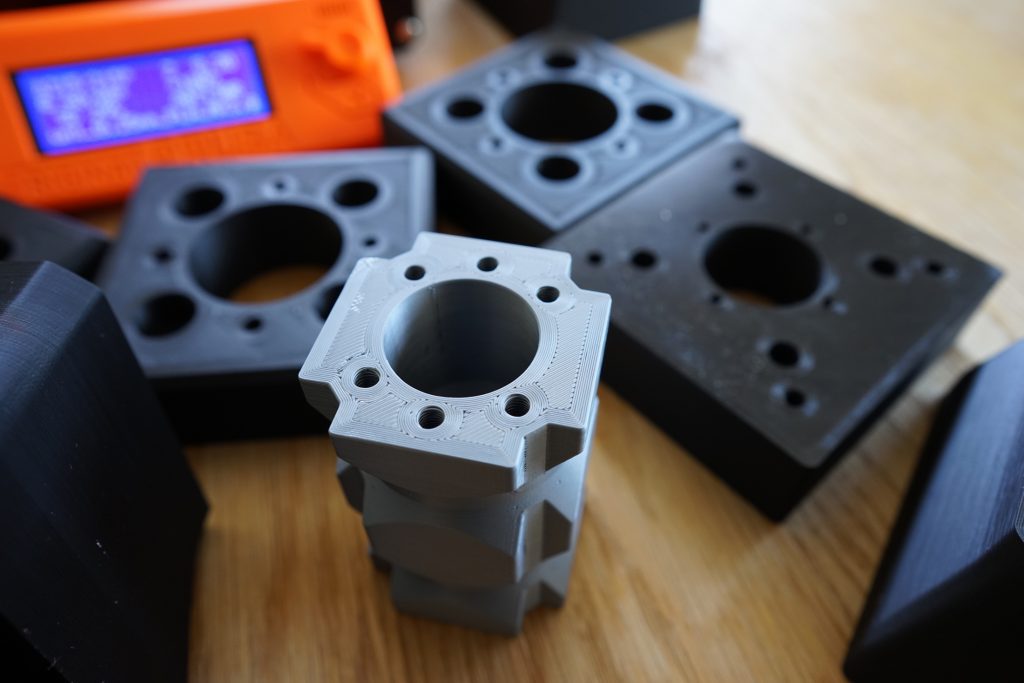
Closeup showing the extruded lines generated by Slicing software
Some builders are lucky and have access to printing services cheap (friends) through to commercial quotes upto $900EUR to $1600AUD. You will need to make a “buy vs outsource” decision.
Owning a 3D printer you get these advantages:
- Any replacement parts in the unlikely event an original fails you can re-print
- Build other things when you want (button boxes, steering wheel components)
- Involve your family printing things for them. Everyone loves seeing 3D printers in action.
A number of the project team have Prusa i3 printers through their paces. These are known to produce good consistent results and highly rated albeit they are expensive (approx $750 USD in kit form + shipping). One of the team’s Prusa printers has done 30 days worth of printing in a 3 month period with no issues whatsoever. Some other printers that have been used for to build the parts are :
- Creality CR-10
- Creality Ender 3 Pro
- Anycubic I3 Mega 3D
There will be many other printers you can use – there is a large amount of reviews online of various printers all at very different price points.
The SFX team used either of Simplify3D (paid) or Slic3r PE (supplied with the Prusa i3) to print our parts.
PLA was the chosen material and has been proven to be strong enough under serious load testing. One of the team members has some harsh NZ sunlight streaming into his garage on black PLA with no issues so far.
If you prefer PETG, go try it – it will be slightly trickier to print with.
Dimensional calibration
It is important that you get your printer printing parts that are ‘dimensionally correct’. Ie without calibration there is a good chance the slider may not fit properly inside the extrusion. The recommendation is to print a small part of the Slider approximately 15mm worth, then try inserting it into the extrusion and making sure it will fit.
Please note this is another reason why you may want to consider doing your own printing – you have control over this.
Simplify3D settings
Use your already working / printing profile and change the following settings,this will make the prints rigid 🙂


Slic3r PE Settings
- Download and run Slic3r PE edition
- Create a Custom Profile
- Use a 20% profile as a starting point
- Print Settings Tab:
- Layers and Perimeters
- Layer height: 0.25mm
- Perimeters: 8 minimum
- Horizontal shells Top: 12 Bottom :12
- Infill
- Solid infill every: 20 layers
- Fill density: 20%
- Layers and Perimeters
For the official STL files please go to our downloads page:
Other community files
The following for files you may find relevant from the community:
Controller Box for Arduino
Two options are available, a larger version using the DB25 screw in terminals, and the other a smaller unit for directly wiring in cables skipping the terminals.
- Controller box when using DB25 breadboard style connectors byxhillb61 https://www.thingiverse.com/thing:3286372
- Controller box when using wiring direct to Ardunio by Nick Moxley https://www.thingiverse.com/thing:3402880
- Warped pieces – don’t worry too much about the bearing carriers or motor mounts if they’re warped a small amount. It is quite difficult to get them to stay perfectly flat. As the PLA cools it starts pulling at the edges of the print – it may lift it off the bed slightly. If you want to get them perfect then you may need to look at building a small enclosure around the printer to keep the temperature more constant of the print.