The controller is what takes the output from SimFeedback on your pc, to signals to the AC Servo drives. It comprises an Arduino (that you’ll flash with our custom firmware) with specific wiring as described below.
In order to wire it you have 3 options for managing the connections (eg all the ground wires need to be connected)
- Breadboard – this has a grid pattern on it, and depending on which segment of the bread board either horizontally or vertically all the sockets are connected.
- Wago connectors – these allow you to join the wires without requiring any soldering, and is a more suitable for a permanent wiring solution
- Crimping/soldering – A little bit more skill and tools required, permanent and smallest option for wiring.
-
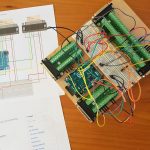
- Breadboard approach
-
- Wago Approach
-
- Soldering/crimping approach
You also have two options for connecting the Arduino to your servo drives
- A DB-25 male socket that’s wired to the Arduino and placed in a housing/piece of wood, you then use a standard DB25 cable
- Hardwired a DB25 Connector to CAT6 cable or similar, that’s wired directly to the Arduino.
A number of builders started with the breadboard approach first then migrated to a smaller/permanent solution later.
This page will only cover the Arduino electronics for the Servo Driver. For Connecting the Servo Controller and Servo motors see the Servo manual.
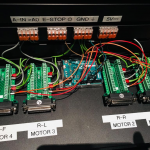
Arduino Pins
| Motor 1 | Motor 2 | Motor 3 | Motor 4 | DB25 PIN | |
|---|---|---|---|---|---|
| STEP | 8 | 9 | 10 | 11 | 3 |
| DIR | 4 | 5 | 6 | 7 | 4 |
| ENA | A0 | A1 | A2 | A3 | 6 |
| 5V | 5V | 5V | 5V | 5V | 9 |
| GND | GND | GND | GND | GND | 5, 10, 14 |

Motor Setup
Motor 1 = Front Right
Motor 2 = Rear Right
Motor 3 = Rear Left
Motor 4 = Front Left
*all from Riders view
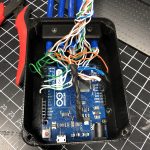
To house your Arduino, wiring and connectors you will need to find something suitable. The options fall in 3 camps:
- Piece of wood inside some other box of choice. Simple, cheap.
- Ditching the breadboard, and going to a soldering approach the community has a couple of options for you for a 3D printed enclosure to house DB25 connectors and Arduino. There are two on thingiverse with the Arduino exposed https://www.thingiverse.com/thing:3202089 and one with it fully enclosed https://www.thingiverse.com/thing:3286372
- Getting rid of the DB25 connectors and going for the smallest package you have this https://www.thingiverse.com/thing:3402880
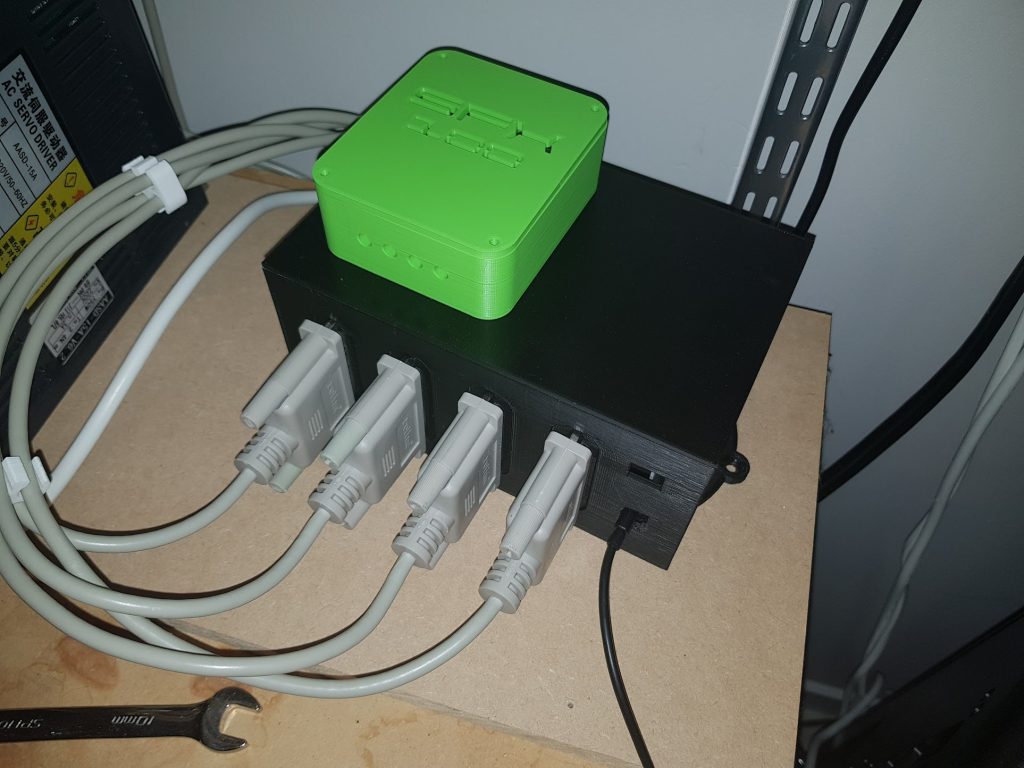
Size comparison of option 2 and option 3