This is the best manual available online https://www.machsupport.com/forum/index.php?action=dlattach;topic=33543.0;attach=44811
Please review the above PDF, page 25, for how to operate the servo drive control panel
The AC Servo Drives do not come wired with mains power plugs. They have connections for single and three phase mains voltage inputs. As every countries laws and requirements are different for obvious reasons we’re not going to advise you on what to do here.
The servo drives are 220v. So if you have 110V only you will need either a 220V outlet to be installed (OR) a step up voltage converter. You can research the forum threads listed on the homepage for other SFX builders and their experiences.
Example of voltage converter : https://www.amazon.com/gp/product/B004MPR43A/ref=ppx_yo_dt_b_asin_title_o03__o00_s03?ie=UTF8&psc=1
Caution
(1) Mains voltage can kill – please take this part of the build very seriously. We strongly suggest you consult a qualified electrician
(2) Use an isolating device such as an RCD to reduce risk.
(3) Do not refer to pictures alone on the internet, every country has their own colour code for wiring and some countries use same colours with opposite meaning eg Brown in one country is phase, another is neutral.
Plug the servo into the controller, turn on the mains (be very careful) and make sure it powers up properly. Assuming it does then run the test according to the guide.
- Put the motor on the ground
- Secure the motor.
- Next you can perform a simple test
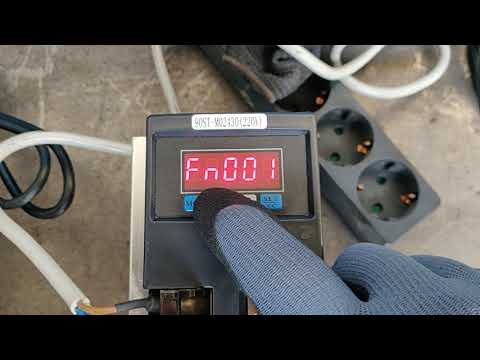
- Change to the functions level and use the following function
Fn002 JOG Trial operation - Use the Up and Down arrows to spin the motor
This video will show you how :
You need to set some parameters on each servo drive to function correctly. Please take your time with this.
Once you’ve configured a drive put a piece tape on it so you know you’ve configured it
- Tap MOD until you see Pn000. This is the parameter mode that we will use
- With Pn000 on the display, tap up/down to find the number you need to change from the list below (eg Pn008).
- Press and briefly hold SET. The display will now change to a numerical value, this is it’s current setting
- Then tap up/down to set the correct corresponding numerical value from the list.
- Then press and briefly hold SET, it will flash to indicate it’s programmed
- Then tap SET to go back up to the original program setting [note this won’t be necessary if you haven’t changed its value].
- Select the next number as per step 2, rinse and repeat steps 2-5 until all parameters in the list below have been entered on all four servo controllers.
Parameter values:
P8 = 300
P9 = -300
P51 = 1200 (3000) - Max RPM, start slow!
// Step Input Multiplier
P98 = 20 - Puls Multiplikator
P109 = 1 - smoothing, 1=fixed smoothing, 2=s-Shaped smoothing
P110 = 30 - Smoothing Filter Time
P113 = 20 - Feedforward %
P114 = 10 - Feedforward Filter Time (ms)
P115 = 100 - Gain %
You might find some forum posts suggesting changing values to extract even more performance out of the system. We haven’t tested on settings other than the above- we don’t know what the results will be. You’re on your own at that point 🙂